Calem Blogs
How to Add Custom Fields and Customize Forms
This blog was renamed from: Add Custom Fields and Customize Forms for User Skill Matrix
I have touched upon customization in Calem in previous blogs in piece meals. This blog dives into the details through the implementation of a business case. It can be used by administrators to customize other data objects. Here is the business case:
- An organization likes to track skill matrix for maintenance staff. A maintenance user can have the following skill matrix:
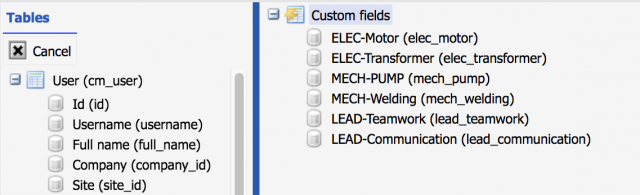
- Electrical: Motor, Transformer, etc. for electricians
- Mechanical: Pump, Welding, etc. for mechanics
- Leadership: Teamwork, Communication, etc.
- Other skills.
- Each skill item is identified by an integer from 1 (below average) to 5 (outstanding)
- An administrator can view the skill matrix in Calem and edit them. The matrix can be used for job assignment and other purposes.
- Add skill matrix attributes as custom fields in user object.
- Customize list view to show the custom fields.
- Customize read view to show the custom fields.
- Customize edit view to edit the custom fields.
Step 0. Identify the Model for a Form
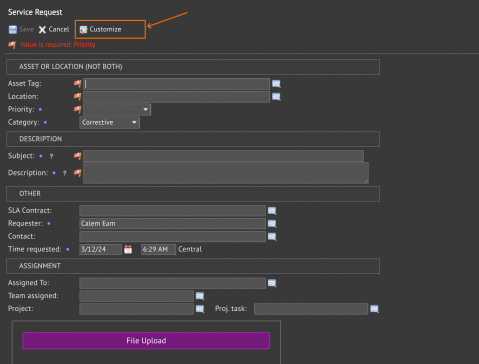
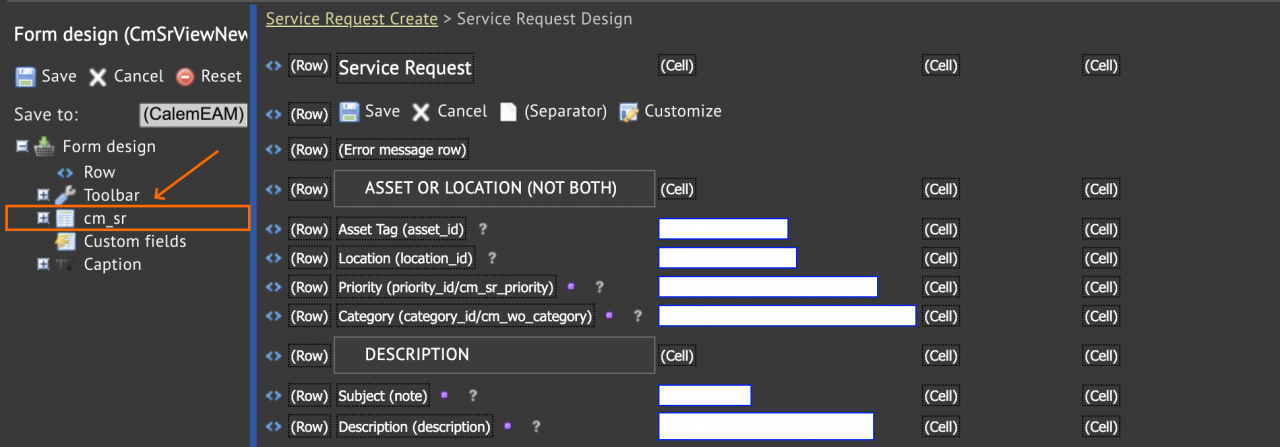
Each form in Calem is based on a model. A model is a table or a view. A custom field can be added to tables. One can identify the model for a form by "Customize" menu.
- For read/edit/new forms, the table and custom fields are shown in the left panel of designer views (through "Customize" menu).
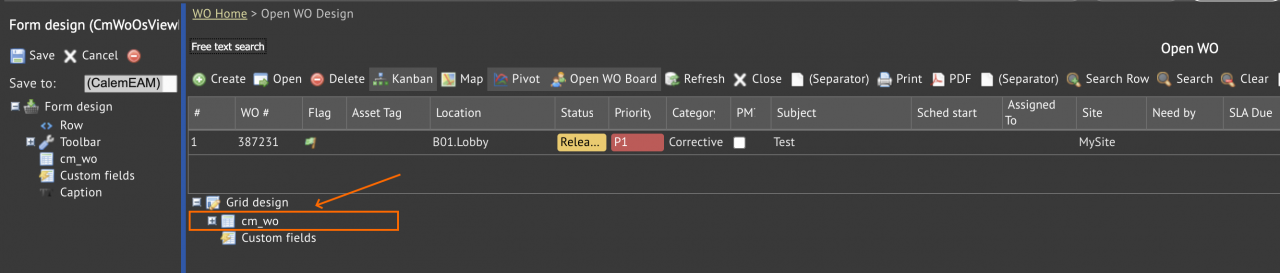
- From list and lookup forms, the table and custom fields are shown below the list view in the designer view (from "Customize" menu).

Step 1. Add Custom Fields
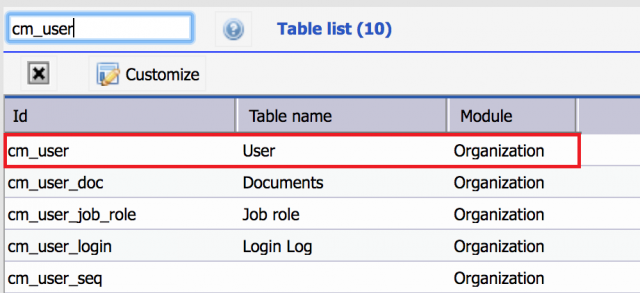
Once a table is identified to add additional fields, admin users can add these custom fields to the table in Calem. The menu path is: Admin module | Data design | Tables
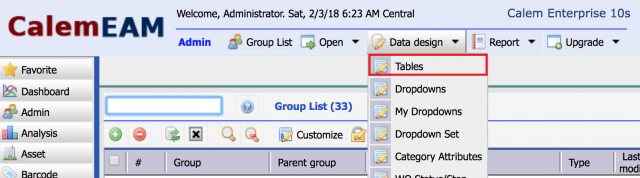
User table is the one to customize. The table name is "cm_user".
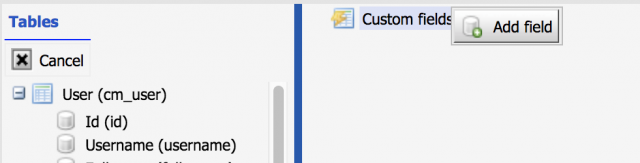
Right-click on "Custom fields" node to add custom fields one at a time.

Step 2. User List View Customization
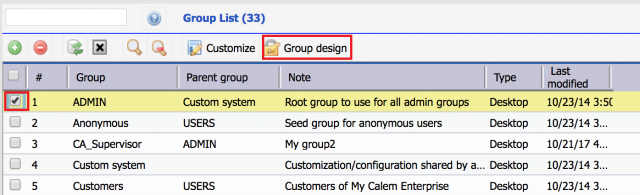
The first action is to identify the group of users to customize the user list view:
- Go to Admin | Groups | Check the group to customize and click "Group design".
- You may pick Admin Group to customize the list view so that only admin users such as supervisors can see the skill matrix.
- To customize for all users, select "Custom system" group.
Next, go to user list to customize it:
- Menu path: Organization module | ACL Profile | User list
- Click "Customize" to customize the user list view.


Right-click in the caption area of the list view to pop up the list of fields of the table. Click "ELEC-Motor" to add motor to the list. Repeat the step for each additional custom field so they all show in the list view.

Next, you can drag-and-drop a column to move it around around. Just right click on a column's right sash to resize it. Finally, remember to save your customization at the "Save" button in the left panel of the list view design. The following are the list view with custom fields added and column size adjusted to use space more efficiently.

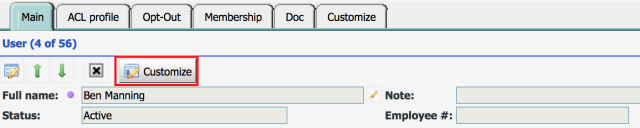
Step 3. User Read View Customization
We also want the custom fields to show in user's record view.
The first action is to identify the group of users to customize - see the step above. Next, go to user read view to customize it.
- Menu path: Organization module | ACL Profile | User list | click a user row to open its read view
- Click "Customize" to customize the user read view.
Drag "Row" in the left panel and drop it to the right panel to add blank rows.
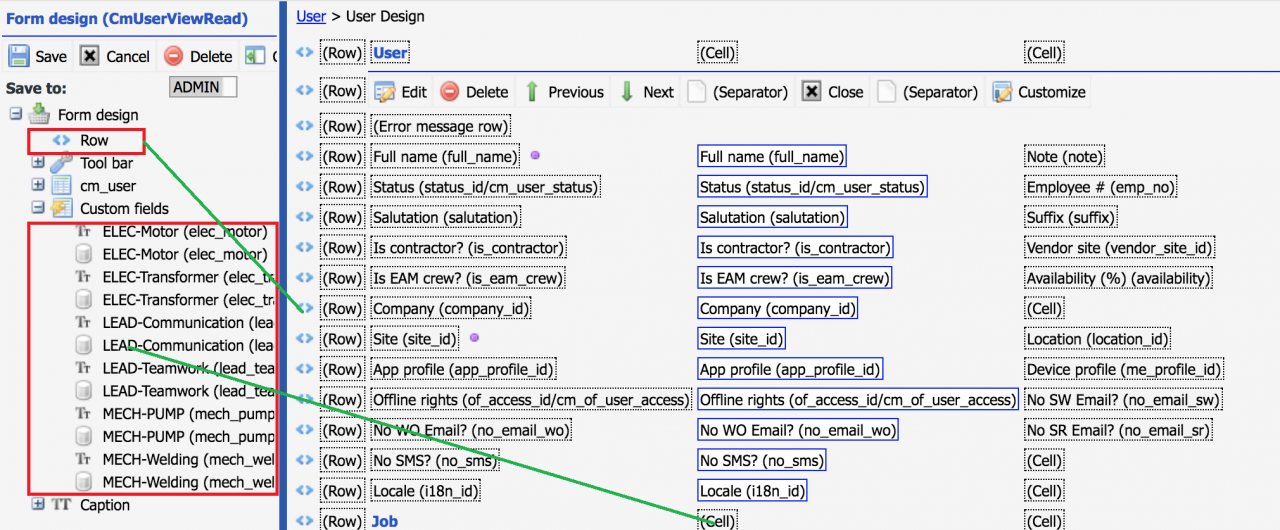
Next, drag the labels and fields from "Custom fields" folder and drop to the blank cells in the right panel one at a time so the custom fields and labels are shown in the read view. "Other" caption is also drag and dropped to a blank row indicating the section for skill matrix.

Finally, save the customization by click "Save" button in the left panel (above "Form design").
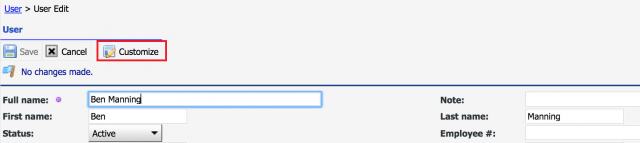
Step 4. User Edit View Customization
The custom fields are now shown in the list view and read view. However, we have not had a way to input or edit the skill matrix fields. The edit view customization will allow us to do it.
The first action is to identify the group of users to customize - see the step above. Next, go to user edit view to customize it.
- Menu path: Organization module | ACL Profile | User list | click a user row to open its read view | click "Edit" menu to edit the user record.
- Click "Customize" to customize the user edit view.
- Creation screen can be customized the same way.
- Click the green "+" button in User List screen to launch user creation screen.
- Click "Customize" to customize the creation screen.
The customization process is the same as for read view:
- Drag "Row" in the left panel and drop it to the right panel to add blank rows.
- Next, drag the labels and fields from "Custom fields" folder and drop to the blank cells in the right panel one at a time so the custom fields and labels are shown in the read view. "Other" caption is also drag and dropped to indicate the section for skill matrix.
- Finally, use "Save" button in the left panel of edit view design to save the customization.
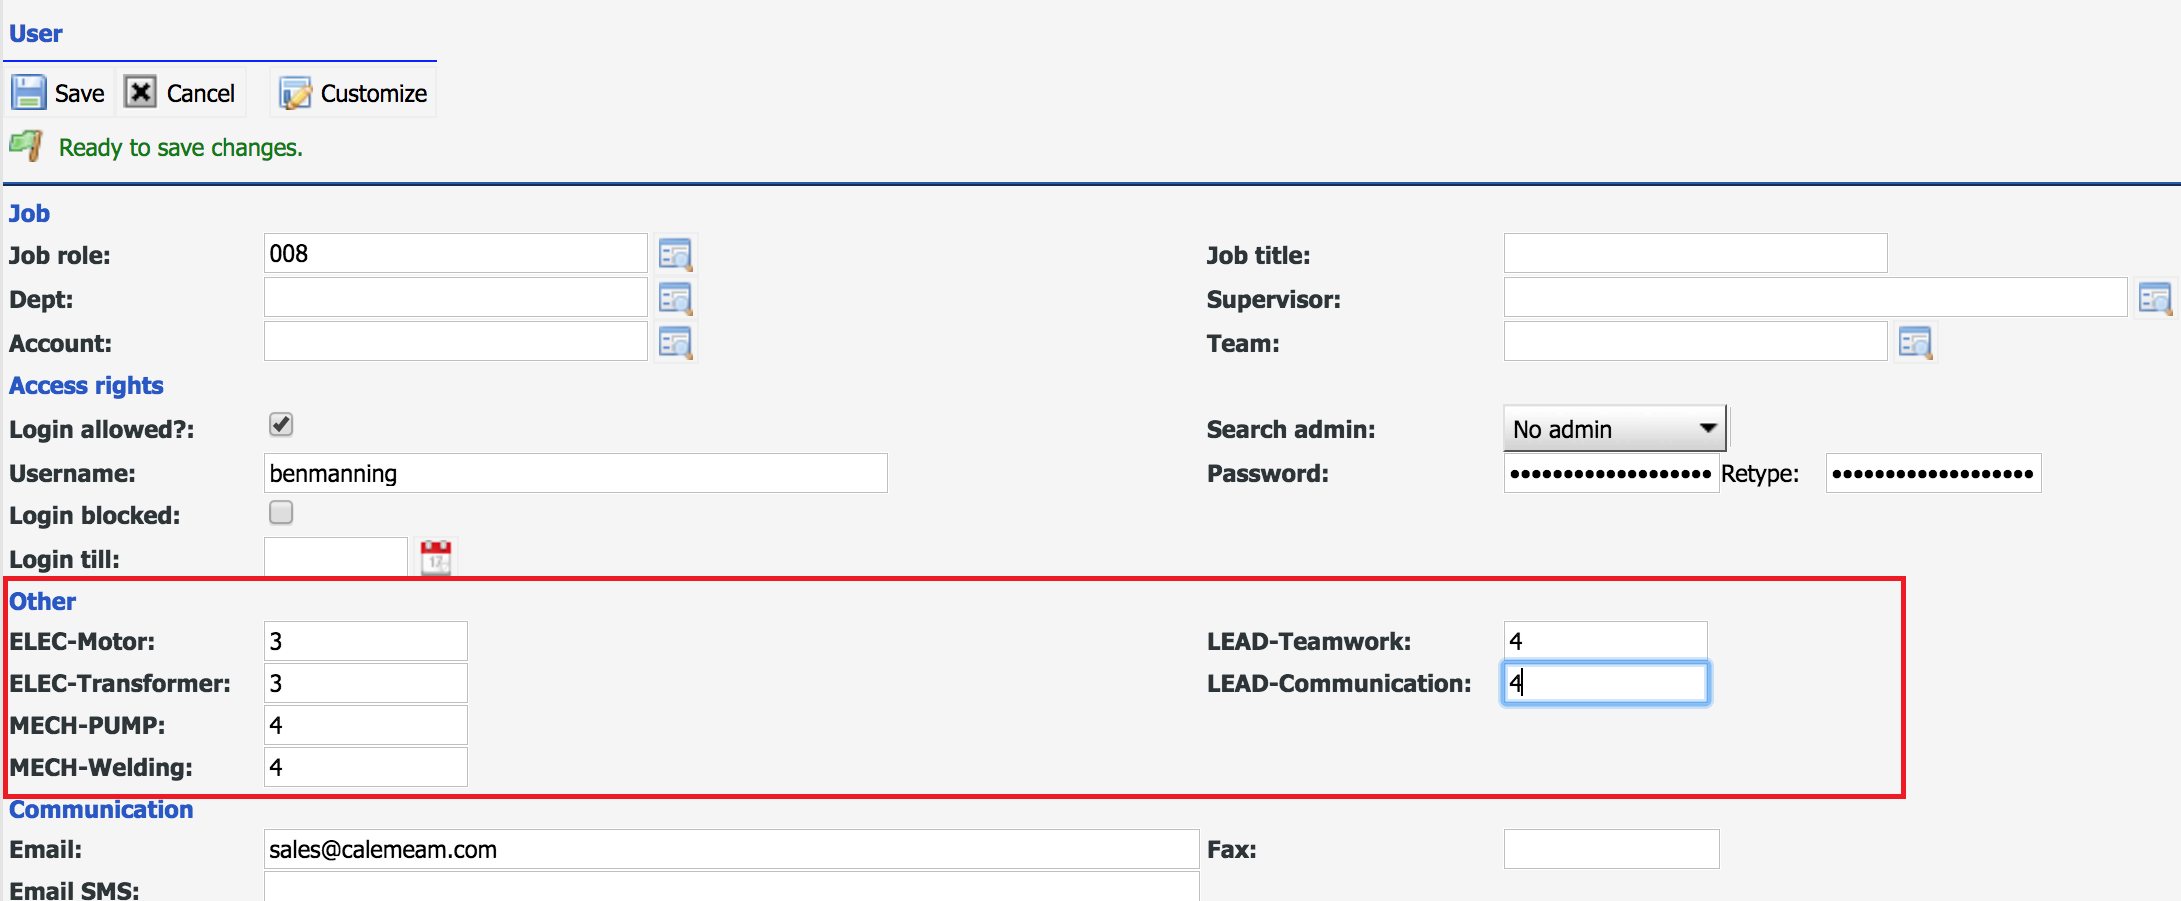
The business case stated at the beginning is now fully implemented in Calem. You can apply the processes in this blog to other business cases of yours to expand the use of Calem in your organization.
Additional resources
- How to Customize List Views and Reports
- Calem Enterprise Customization
- Calem Mobile Customization
- User Guide and Admin Guide (customer account required)
- Calem Enterprise Training Site
- Calem Enterprise Blogs
- Calem Enterprise demo
About the author

By accepting you will be accessing a service provided by a third-party external to https://calemeam.com/