Calem Blogs
How to Increase Productivity with Home Form
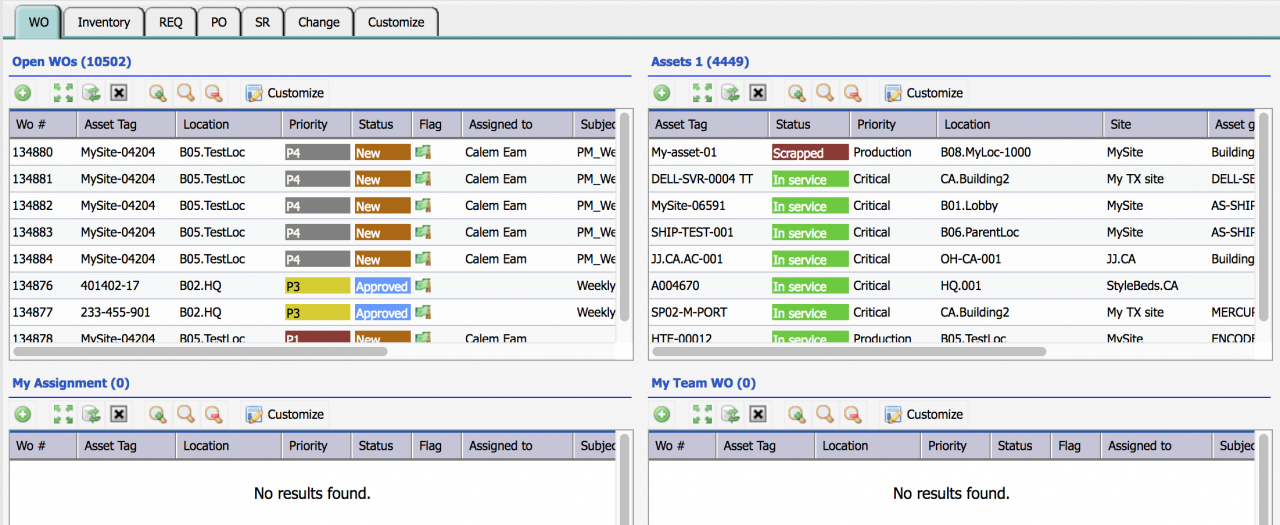
Home form is introduced in Calem Enterprise R11b. It is the default form in Favorite module. Home form is shown when Favorite module is the first module in your module bar (the left vertical menu bar). In this blog I will show you how to increase your users' productivity with the Home form.
Let's start with the purposes of the Home form. The Home form is designed to show data objects for the login users so they can work on their tasks right away. For example,
- Maintenance supervisors may have a home form showing work orders that are open, on-hold, or need to be reviewed; and purchase requisitions that need to be approved.
- Technicians may have a home form showing work orders that are opened and assigned to them.
- Inventory staff may have a home form showing items pending receiving, and most recent inventory activities.
- Purchase supervisors may have a home form showing requisitions that are approved, and POs that need approval.
The default Home form comes with tabs each for a module. The default form can be customized to show only one tab with objects from various modules.
The home form allows flexible customized. Here are the steps:
- Select a group of users to customize
- Customize Tab Layout
- Customize Object Lists to Show
- Customize the title an Object List
- Set a default search for an Object List
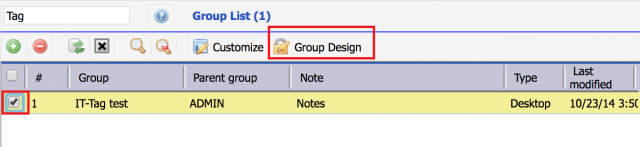
The first step is to select a user group to customize. The group customization allows you to define a home form based on user job roles.
- Menu path: Admin | Group List | Select a group | Click "Group Design"
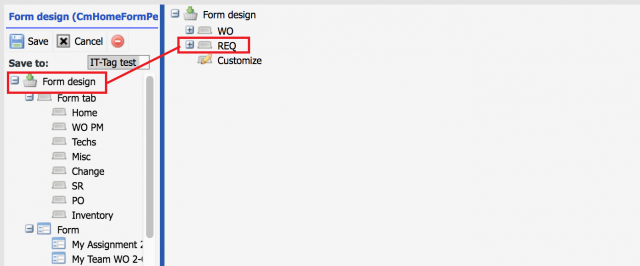
Step 2. Tab Layout Customization
This step is to pick a seeded tab to use for the user group selected based on their job roles. For instance, maintenance groups will use "WO" tab. You may choose to use more than one tab in the home form.
- Go to Home form
- Click "Customize" Tab to launch tab customization
- Use drag and drop tabs to the "Form Design" node in the left panel to remove tabs that are not used

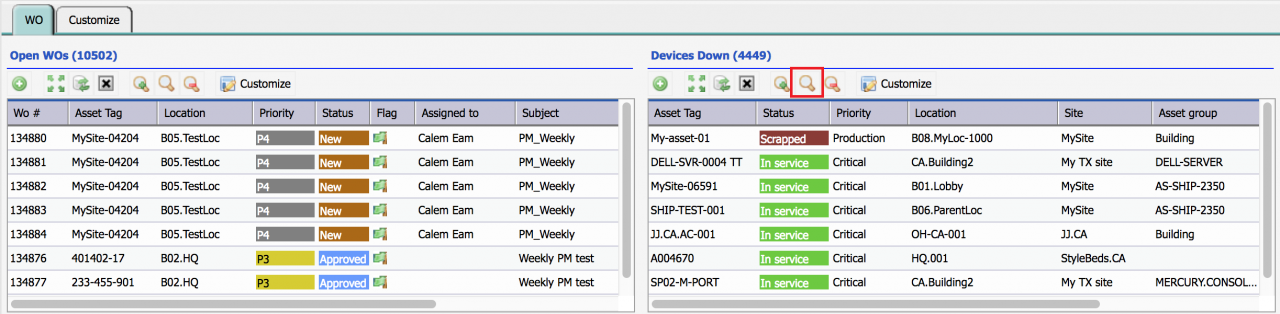
Step 3. Select Object Lists to Show
The Home page uses a two column layout. Once you decided which tabs to show you may pick object lists in "Form" folder, drag and drop them in either "Column 0" or "Column 1". You may order object lists inside a column through drag and drop. Once you are done, click "Save" in the top level panel to save the customization.

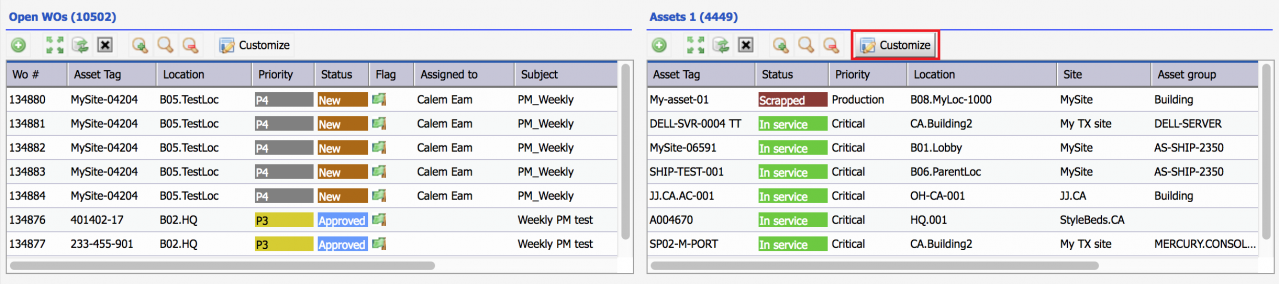
Step 4. Customize the Title of an Object List
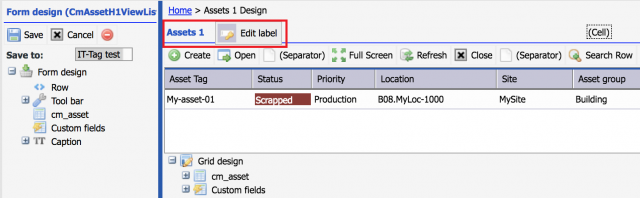
Next is re-purposing seeded object lists. The first step is to customize the object list title. For example, we select "Assets 1" form and customize the title to "Devices".
- Click "Customize" in the list form.
- Right click on the title, the menu "Edit label" will popup, click the menu to edit the form title.
- Change the title to "Devices" and save it.
Step 4.1 Default Search in the Title
When default queries are defined for forms in the next step, a default query's name is appended to a form's title. So, you may keep forms' titles generic such as Devices, WOs, etc. with default queries.
Step 5. Set a Default Search for an Object List
The next step is to create a default search for the object list. Once this is done, the object list will open in the home form with the default search applied.
- Click on Search menu to open the saved search form
- Click "+" to create a new search or use an existing search
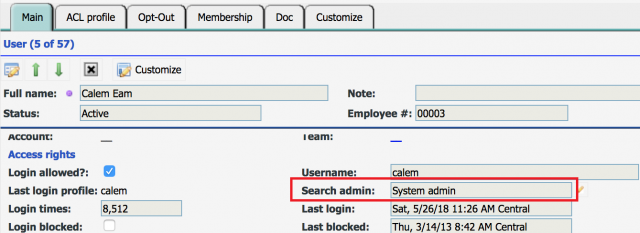
- In the search edit form, make sure the search will be saved as "Shared by everyone". If this option is not showing up, you may edit your user record (Organization | ACL Profiles | User List | Find your user record and edit it. Set "Search admin" field to "System admin").
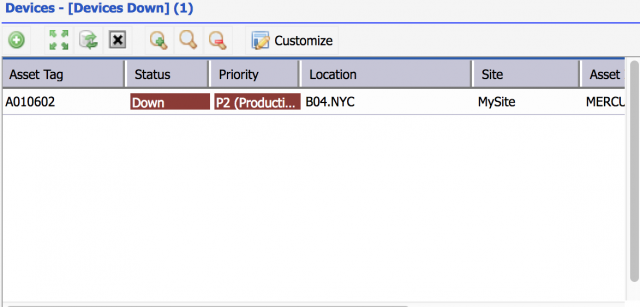
- Save the search as "Devices Down"
- Finally, in the search list form, select "Devices Down" and use "Toggle Default" to make it the default query. "Devices Down" will be applied to the asset list form at open.
- The site access control for the login user is enforced along with the default search you configured here. So, a user with access to SiteA will only see data of SiteA based on your default search.


You are all set for the "Devices Down" list which shows all devices that are in the "Down" status. You may repeat the customization steps for other object lists. The home form is a powerful tool. It makes the relevant data right at the finger tips of your users to maximize their productivity with Calem Enterprise.
Step 6. Auto-Refreshing
Auto-refreshing every X minutes can be enabled by Calem support team. Contact your Calem support to enable a form by the form's name such as CmWoH1FormList (see Step 3 above).
By default the following forms are enabled for auto-refreshing:
- CmWoH1FormList
- CmWoH7FormList
Additional resources
- Add Custom Fields
- Object Categorization
- Calem Enterprise Customization
- User Guide and Admin Guide (customer account required)
- Calem Enterprise Training Site
- Calem Enterprise Blogs
- Calem Enterprise demo
About the author

By accepting you will be accessing a service provided by a third-party external to https://calemeam.com/