Calem Blogs
Data Upload Part 2: Asset and Location
This blog series present the data setup through uploading data from excel templates. Inventory module is discussed in Data Upload Part 1: Inventory Module.
Here are some background about excel templates and data upload:
- An excel data template is generated for each table in Calem. Customers can download the archive of all the templates at https://support.calemeam.com/view.php?id=4046. A customer account is required to download the templates.
- The Data Upload Guide has information for some tables that should not be uploaded including transaction tables that are generated in Calem. Customers can reference the Data Upload Guide at https://support.calemeam.com/view.php?id=3983. A customer account is required to download the Guide.
- The excel templates can be used to create new data or update existing data. So, you can use the same excel file to create data and make changes by uploading the file more than once.
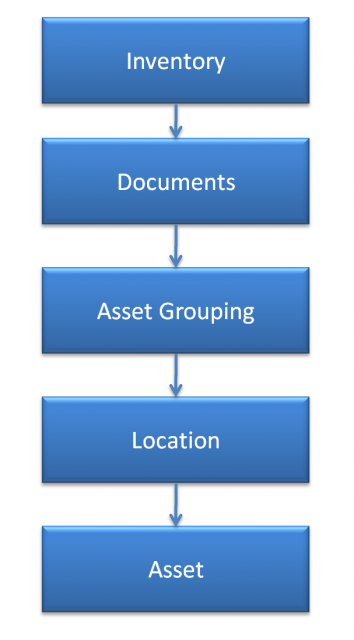
This is the second part of the data upload tutorial. This blog serves as the detailed walk-through for the steps defined in Calem Setup Part 1: Asset and Location.
Step 1. Inventory
Inventory module may be referenced by asset module based on your business requirements. Use resources below to set up inventory module.
- Upload via Excel Templates: https://www.calemeam.com/component/easyblog/upload-1-inventory-setup-by-data-upload?Itemid=250
- Setup steps via screens: https://www.calemeam.com/component/easyblog/data-setup-part-1-inventory-setup?Itemid=250
Step 2. Documents
Documents including photo, drawing, manuals are referenced by assets. Upload documents via Calem web client. See documents of Calem Setup Part 1: Asset and Location for more information.
Step 3. Asset Classes
- Asset class template: cm_categorization.AssetCategorization.xls
- Asset class has "Asset" flag set to "1".
- Asset item template: cm_in.Global_Items_AssetGroups.xls
- Asset item is a global item with "Asset group?" set to "1".
Step 4. Location
Upload location by the location template: cm_location.Locations.xlsStep 5. Asset
Upload asset by the asset template: cm_asset.Assets.xlsAsset spares can be uploaded by the excel template: cm_asn_part.AssetSpares.xls
- When to Choose Asset Spare Parts by Asset
- Asset grouping blog
- User Guide and Admin Guide (customer account required)
- Calem Enterprise Training Site
- Calem Enterprise Blogs
- Calem Enterprise demo
By accepting you will be accessing a service provided by a third-party external to https://calemeam.com/
