Calem Blogs
A Revisit of Inventory Transfer and Disposal
Inventory transfer was introduced in release R2022a (March 2022). It has gone through updates based on feedbacks from customers. The latest update is available in R2024f (December 2024).
- The process is more efficient for end users.
- Barcode scan is integrated for Calem Mobile.
- One or more items are allowed to be transferred to other sites or disposed.
- See this blog for enabling storerooms to receive transfer-in items.
1. Permission for Transfer and Dispose
Permissions need to be configured for item transfer and disposal.
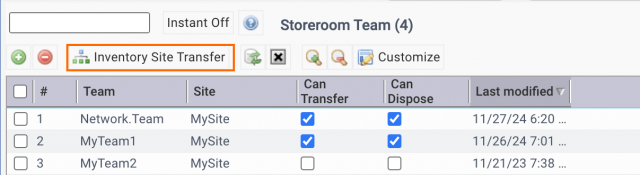
- Menu: Organization | ACL Profiles | Storeroom Teams. Set up teams who can transfer and/or dispose items by sites.
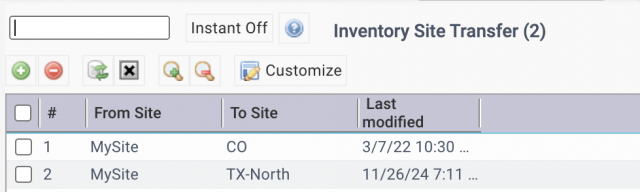
- Use "Inventory Site Transfer" to set up permitted sites for item transfer.
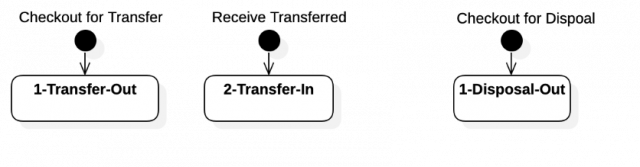
2. Transfer-Out (Checkout)
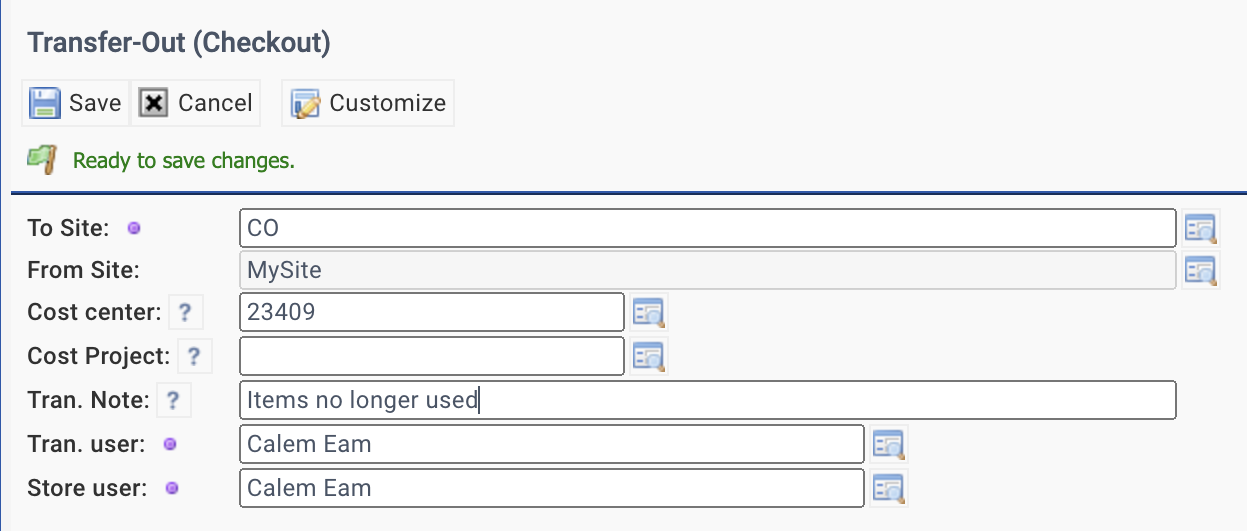
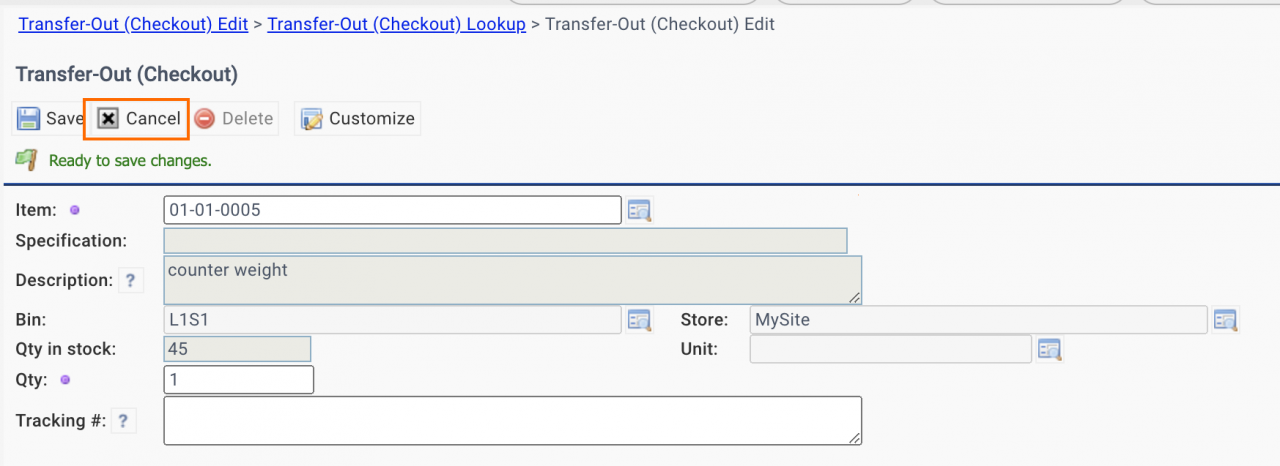
The first step of item transfer is to check out items from inventory for shipping to other sites.
- Transfer-out menu is available in Inventory and Barcode modules.
- Inventory | Transactions | Transfer-Out (Checkout).
- Barcode | Transfer-Out (Checkout).
- Set "To Site" to launch the transfer process. Enter cost code and notes. Click "Save" to continue.
- Populate a stock item to checkout. Scan an item code if Calem Mobile is used. Click "Save" to add an item for checkout.
- Click "Cancel" when done adding items to review the items added for transfer.
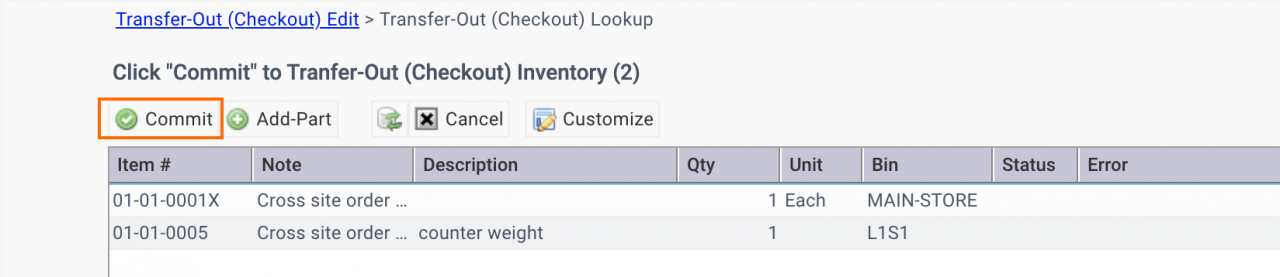
- Click "Commit" to complete the transfer and checkout.
2. Transfer-In (Receive)
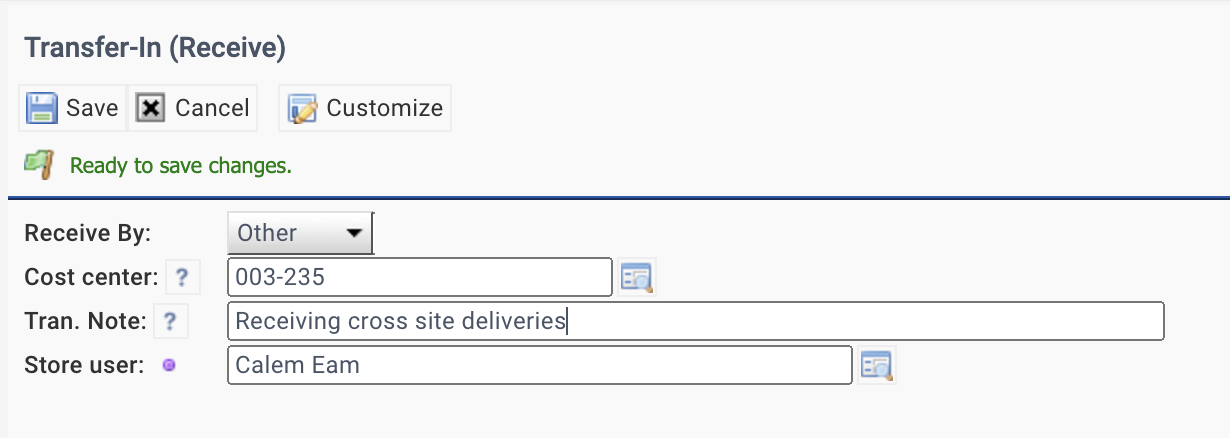
The second step is performed at a "To Site" when items arrive.
- Transfer-in menu is in the inventory module:
- Inventory | Transactions | Transfer-In (Receive).
- Items may be received individually (by Other, or by Batch), in the first screenshot below.
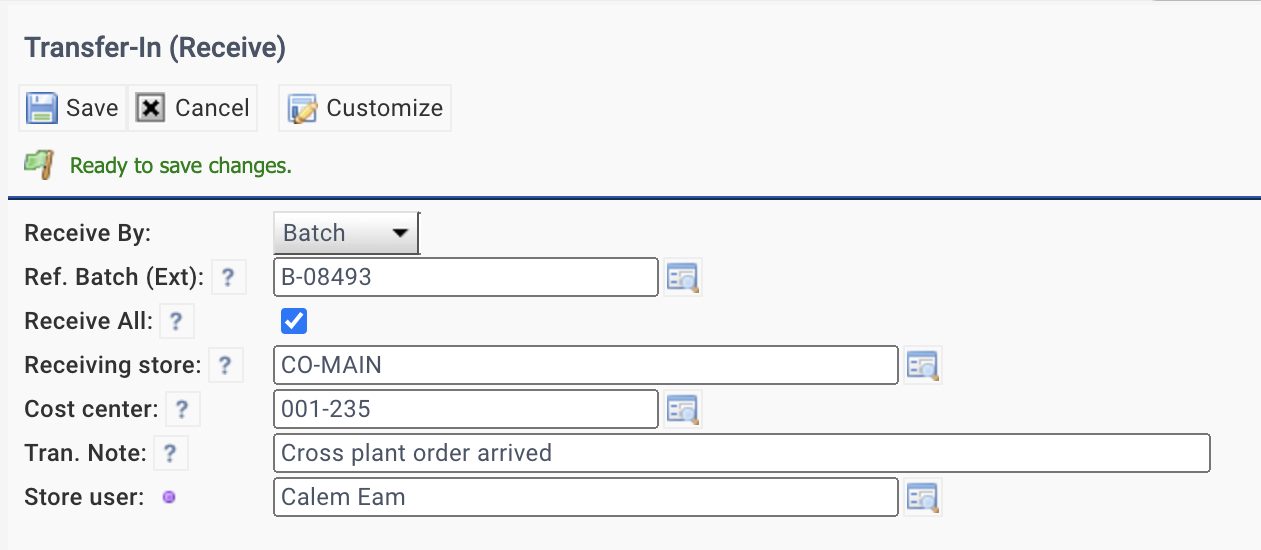
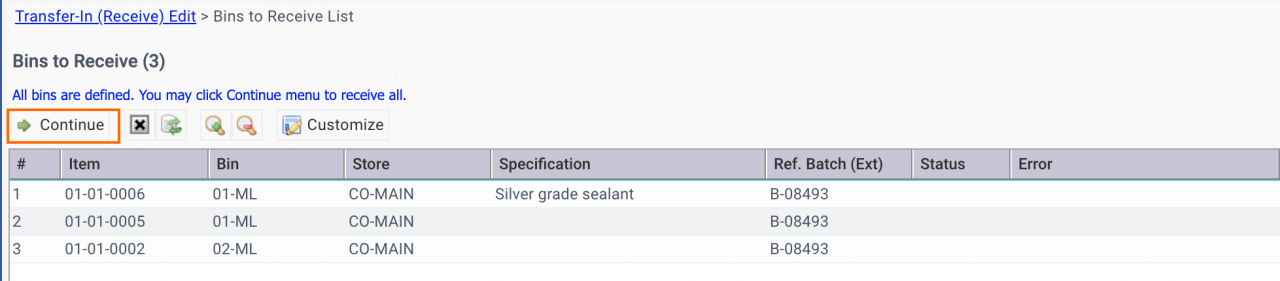
- Items may also be received by batch so all items checked out for transfer in a batch can be received.
- This is done by checking "Receive All" when receiving by Batch (the second screenshot below)
- A storeroom needs to be specified for "Receive All".
- The next screen allows one to populate bins for all items. Calem will prefill the bins based on stock usage when applicable.
- You may click a row to populate a bin not filled, or change a bin.
- Click "Continue" to complete receiving all items in a batch.
3. Disposal (Checkout)
Inventory items can be disposed or scrapped by the disposal transaction.
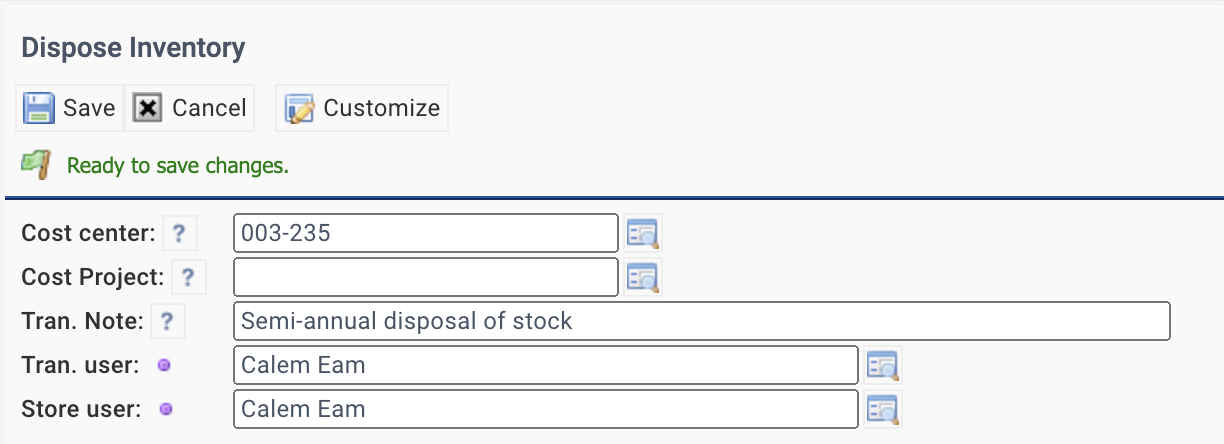
- Menu: Barcode | Dispose Inventory. It is also available from Inventory | Transactions | Dispose Inventory.
- In the initial disposal screen, enter cost code and notes. Click "Save" to continue.
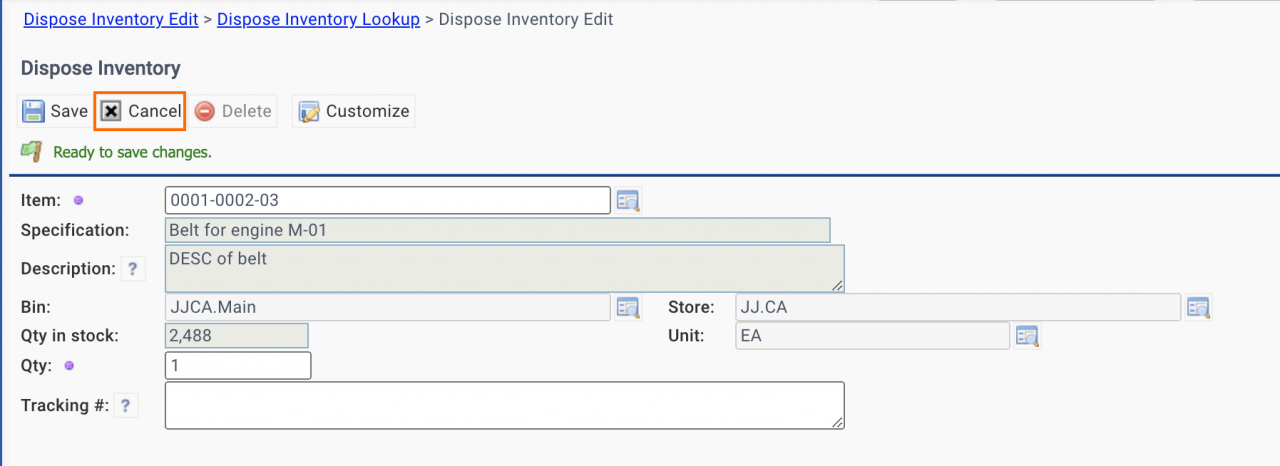
- Populate a stock item to dispose. Scan an item code if Calem Mobile is used. Click "Save" to add an item for checkout.
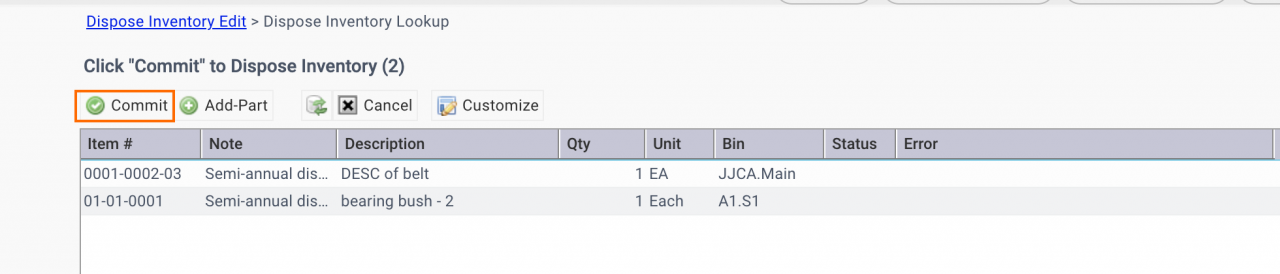
- Click "Cancel" when done adding items to review the items added for disposal.
- Click "Commit" to complete the checkout and disposal.
3.1 Deactivating Inventory after Disposal
The status of an inventory may be turned into inactive after disposal when there is no stock for the inventory. This feature can be turned on through configuration. The feature is turned off from Calem R2026. Contact Calem to modify your service configuration (or see Admin Guide for more info).
4. Integration API Errors
When integrating transactions with 3rd party apps such as an ERP app, integration API errors from Calem to 3rd party can be found in Admin | Report | API Logs (also at: Integration | Open | API Logs). Click a log row to view the details of the data sent and error message.

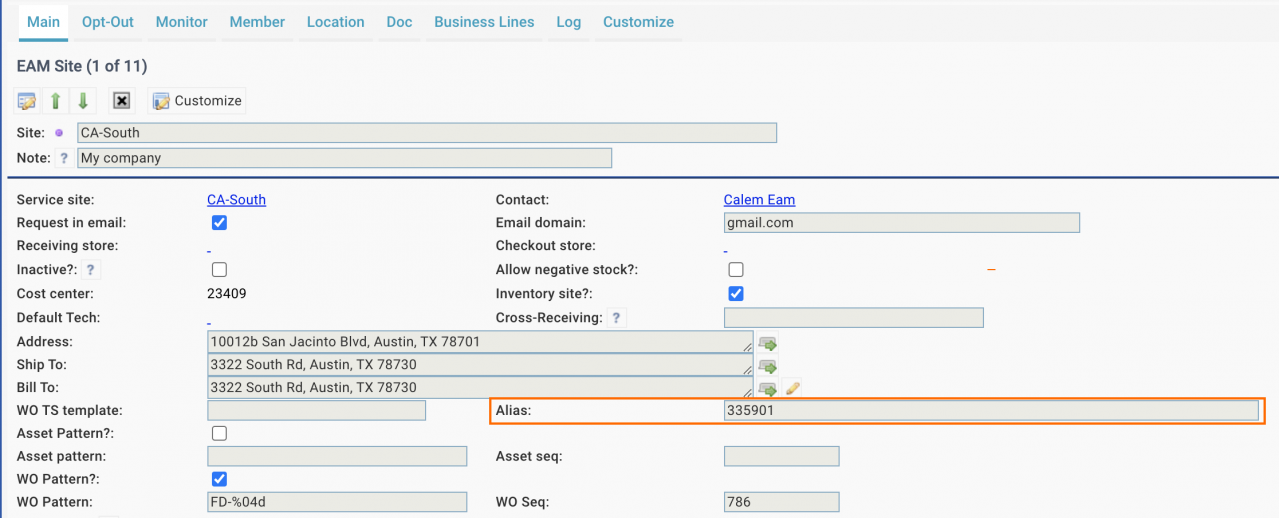
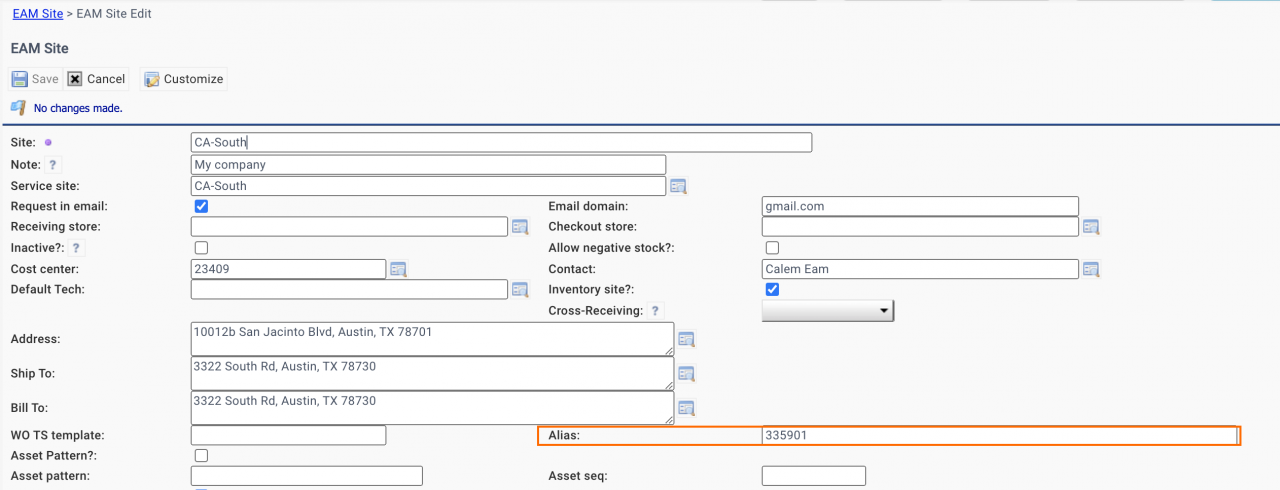
5. Site Alias in Integration
The alias field of the site object may be used for the site a part is transferred to when integrating with a 3rd party apps such as an ERP app. The site alias can be viewed and edited in the site forms:
- Organization | EAM Company | Site Tab

Alias field is visible from the site read form:
Alias field is editable from the site edit form:
Resources
- Enabling Inventory Stores to Receive Transfer-In Items
- Simplifying Inventory Transfer and Disposal
- How to Transfer and Dispose Inventory
- Part Repair Processes in Calem
- How to Track Asset Off-Site Repairs
- How to Use Price Lot in Calem
- Work Order Life-Cycle Diagrams
- Asset Tracking in Calem
- User Guide and Admin Guide (customer account required)
- Calem Enterprise Training Site
- Calem Enterprise Blogs
- Calem Enterprise demo
About the author

Related Posts
By accepting you will be accessing a service provided by a third-party external to https://calemeam.com/